Hollywood Bundle Pack – Colorist Factory:
We're not gonna lie, these are our best set of LUTs till now.
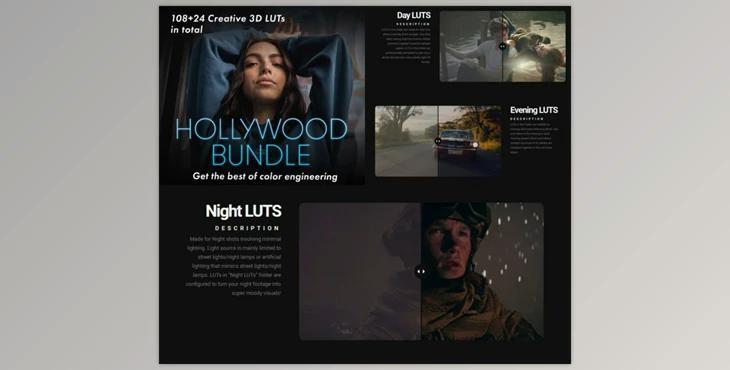
And now we're thrilled to finally be discussing them! A Notion of 132 LUTs carefully engineered on the basis of this"time-based" algorithm. An algorithm that knows the recursive routines of Real-world footage details. Leading to a color science that Guarantees a dramatic improvement in your color grading workflow, even though You are a complete beginner! We have categorized our LUTs into Sunlight, Sundown, Dusk, and Indoor.
Gfx plugin details of Hollywood Bundle Pack – Colorist Factory
The product is in LUTS category , for more information about this post you can click on the home page link in the sidebar.
What's different about those LUTs?
LUTs that are thrown around in the title of"cinematic" is Made by means of one shot. This means if you apply it to another Shooter, it is no rocket science and you are likely to fail in attaining that "cinematic" look.
Thus, we made LUTS dependent on the hour of this day.
Detailed supply of daylight shots, evening Shots & nighttime shots stays respectively optional during different Cameras, places, and budgets. With this simple logic split LUTs into various categories depending on the hour of this day: Sunlight LUTs, Sundown LUTs, Dusk LUTs, and Indoor LUTs.
ADOBE PREMIERE PRO
METHOD 1
Step 1- Open the Color Correction folder and check for the “Effects and Presets” browser. Apply the “Lumetri Color” effect to the footage of your timeline.
Step 2- Scroll to the “Creative” tab in the Lumetri Color Effect Panel. Select the drop-down menu next to “Look”. Click on “Browse.
Step 3- Select your favorite LUT, and it will automatically apply to your clip. Please note that this method works perfectly in Premiere Pro; however, if you want to switch to a new LUT, you will need to repeat the second and third
steps.
METHOD 2
You can manually install LUT in a subfolder within the Premier Pro Application. This will save you time from reloading them every time you want to use a new LUT. To do this, copy and paste the .cube files into the following
Mac: Macintosh HD/Applications/Adobe Premiere Pro/Adobe Premiere Pro. app (right-click and select “Show Package
Contents”)/Contents/Lumetri/LUTs/Technical
PC: C:/Program Files/Adobe/Adobe Premiere Pro/Lumetri/LUTS/Technical Follow these steps once you have placed the .cube files in the appropriate
folder:
Step 1- Open the “Color Correction” folder and check for the “Effects and Presets” browser. Click on it to apply the “Lumetri Color” effect to your timeline footage.
Step 2- Scroll to the “Basic Correction” tab inside the Lumetri Color Effect. Select the drop-down menu next to “Input LUT”.
Step 3- Select your desired LUT from the drop-down menu, and it will be applied to your clip.
Please note that although this method is more convenient than the first method. Premiere Pro technically uses LUT files as “input LUT” as opposed to “output LUT”. This may be an important consideration depending on your overall color workflow
