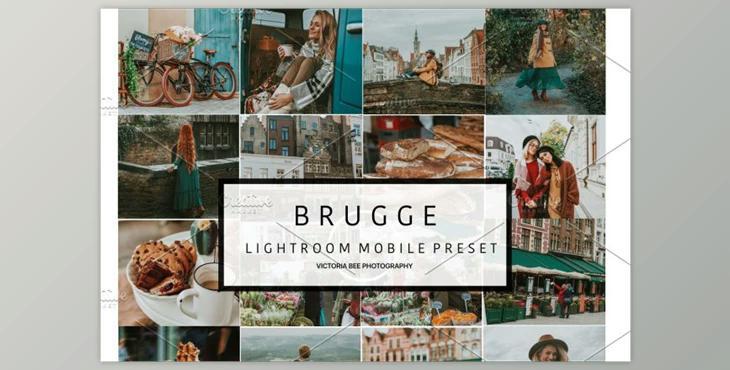
3 Mobile Preset BRUGGE: I developed this preset to enhance my travel Instagram images. This preset produces trendy warm tones, allowing you to shoot more rather than editing.
This preset is great for influencers, travel bloggers photographers, lifestyle photographers, and portrait photographers.
Be aware that each preset works differently for each image based on several elements like lighting and white balance, tones, and so on.
- Mobile Preset is the perfect fit to use with your Lightroom Mobile app and works perfectly with photos were taken using the iPhone as well as an Android device.
- There is no need for any Adobe subscription to access these presets. Simply get the LR Mobile App and create an account with Adobe.
- These preset work with both RAW and JPEG files. For the best results, shoot RAW, or apply the presets to photos that are high-quality and well-lit.
Included
- 5 . LIGHTROOM MODULE PRESET .DNG File .Zip Archive
- 1. PDF Instructions Guide
Downloading and Unzipping the Sets To begin, comply with these instructions:
- Download your presets and unzip them on your phone/tablet/computer
- After you have unzipped the files, look for the files that end in DNG.
- Click on .DNG file
- Look for "Open with Lightroom"..." arrow down" or "arrow up" button top right, press it, then locate the option to open with Lightroom or email the copies to Lightroom or Send a copy to Lightroom, etc.
- If you don't have this option, You can save this .DNG image as an image to the roll of your camera.
- Start the Lightroom CC app and click the "Add Image" and insert the file. The file will be displayed in the form of an image.
- Open the image, click three dots in the upper right corner. Choose 'Create Preset'. Name your preset and save it.
- Return to the Home Page in your App. Upload your own image and then open it. In Edit Mode scroll down the bottom of the screen to 'Presets' and 'User Presets' Select the preset that you've made.